Showing posts with label food. Show all posts

Tuesday, June 20, 2017

Instant Pot Cowboy Beans and Rice Burritos

Sometimes you just want a burrito!


This Instant Pot recipe makes super fast, inexpensive and easy burrito filling. It is even kid-approved: my six year old ate two, and my four year old had no complaints (a rare dinner!). You will find it easy to make, healthy and nutritious!

My version is vegetarian as I use a veggie "ground round", but you can certainly make it carnivore-friendly by using ground beef, and I've included instructions for that.

This version is also on the mild side. If you want to spice it up, here are some ideas: use chipotle sauce instead of barbeque, add more chili powder (or some cayenne), add a small can of jalapeños, or chopped fresh jalapeños as a topping, or hot salsa.

I used roti instead of tortillas, which added a really nice flavour and I recommend giving them a try for the wraps. I picked them up at Walmart of all places - $2 for a pack of 10 which is about half the price of tortillas where I live!

I've mentioned this before, but I love my Instant Pot. I use it pretty much daily, and it has make cooking fun again! This is an affiliate link for the 6-quart pot, which I have; I find it perfect for our family of 4. Most meals we end up with leftovers, which I freeze for busy days when dinner seems daunting.

INSTANT POT COWBOY BEANS AND RICE BURRITOS


Filling Ingredients:

-->
·      ½ onion, diced
·      1 Tbsp oil
·      1 stalk celery, chopped
·      1 c. tomato juice
·      1 c. water
·      1 tsp chili powder
·      ½ tsp salt
·      1 tsp barbeque sauce
·      1 19 oz can beans, drained and rinsed (I used a 6-bean blend; use your favourite or whatever you have handy!)
·      1 c. white rice, rinsed
·      1 lb veggie ground round  (**I use Yves Cuisine veggie ground round, which is pre-cooked. You could use lean ground beef if you prefer.)

To Serve:

·      Grated cheddar
 ·      sour cream
·      Tortillas or roti

1.     Press Sauté button on Instant Pot, wait until it reads Hot, then add oil. Sauté onions until translucent. (** If you are using ground beef, add it with the onions and cook until it is brown and crumbling, then drain any grease off.)
2.     Add remaining ingredients in order. Crumble the ground round onto the top of everything else. Press it lightly so everything is submerged in liquid, but don't stir. Press Rice button and set vent to Sealing.
3.     When finished, allow to naturally release pressure for 10 minutes (that means just leave it alone after it beeps for 10 minutes!). Carefully release the vent to the Venting position, release remaining pressure and open lid. Stir to combine.
4.     Put in tortillas with grated cheese, sour cream and any other desired toppings to serve.

Optional toppings:

 Chopped tomatoes, peppers, lettuce, green onions, cilantro, salsa, whatever you like!


If you try this out, I'd love to hear how it turns out for you! 

Monday, February 17, 2014

Birthday girl

Oh, my, it's been a while. It is amazing how much energy and time two little ones take! My son, now just coming up on 8 months old, has been teething (enough said!). My daughter has just turned three (how did that happen?!). How time flies!

This is just a quick post to share some images from my daughter's birthday. We did a pirate princess party (I had no idea these were so popular, and can thank Pinterest for a lot of the ideas I used at our party!). It was two hours of madness: 14 children and assorted parents. The power went out for 40 minutes in the middle - thank goodness it didn't affect us too much.

I borrowed a giant Wilton cupcake cake pan from a neighbour for her birthday cake. I used the recipes for Dark Chocolate Cake and Raspberry Jam Buttercream from Food.com, and they turned out wonderfully. Unfortunately for ME, every slice of cake and every mini cupcake was gone by the end of the party! On the plus side, I'd made double the batter, thinking I'd need it, and ended up with an extra dozen large cupcakes as well as an 8x8" cake in the freezer. Phew! Personal chocolate crisis averted.

I learned a couple of things about the pan before I baked, and I'm going to pass on these tips for anyone baking a giant cupcake cake with the Wilton two-part pan.  First, turn your oven to 325 degrees rather than 350. Cover the dome side with oiled foil before baking, and remove it after the first half hour. Test after 40 minutes or so, but mine took an hour to cook fully both sides. Apparently you need two cake mix boxes to fill the pan, as the base takes 3 1/2 cups of batter, and the top 2 1/2. But, if you use the truly delicious recipe above, you only need one batch worth (unless you just want loads and loads of cake, which really is okay in my books.

Here's my sweetie before the party:

Love that girl!

Thursday, June 13, 2013

Fibre 1 Almond & Cluster Delight Cereal Review and #freebie! #Fibre1ACD

This one's for everyone, but all you pregnant ladies, pay special attention! As any pregnant mama knows, fibre is so important in your diet. It's important ALL the time, but so much more so when you're pregnant, as your system slows down and slowed down digestive systems mean... well, let's just say it's not good. So including sources of high fibre every day will keep you feeling healthy!

One of my favourite ways to add a bit more fibre into my daily meals is with Fibre 1 cereal. I've been a big fan since pregnancy #1, when I realized that one bowl of this cereal contained 40% (!!) of my daily recommended fibre intake. Not only that, but it's not the dry, cardboardy flakes you might think of when you think of a cereal that is rich in fibre. It's actually super yummy! I was a convert with my first bowl years ago.

Actually, I have a funny story about it. I was out at a cabin with a bunch of friends, and we were doing the grocery shopping for the week. While picking out the cereal, one of the guys suggested Fibre 1. He'd tried it before so knew it was good stuff. A few of the others scoffed, thinking it was a cereal for "old people" or something (what?). Well, I was enthusiastically on board and together we convinced the crew that was the cereal for the week. Guess what? That box disappeared in a hurry and I think once realizing the taste and health benefits we had some converts!

So to see a new version of Fibre 1 arrive on the shelves is exciting for my breakfast routine! I was given the chance to try a box of the new Almond and Cluster Delight before it even hit the grocery stores, and I am happy to report that it is just as delicious as the other varieties. It's just sweet enough, and has loads of almond slices (good for your heart!) as well for an extra boost of healthy protein.

And just as a little bonus, there are some coupons for FREE BOXES available on the General Mills  Life Made Delicious Facebook page! Um, awesome! These special coupons (Canada) are one-day freebies where you can get a box of either the new Fibre 1 or new Honey Nut Cheerios Hearty Oat Crunch cereals on July 16th, and then on the 23rd, choose a free box from five more new and different products including Fibre 1 Protein bars that look so good! These coupons are available through June 25th. So go on and hook yourself up with some free groceries and try some healthy new products while you're at it. :)

Disclosure – I am participating in the Fibre 1 Almond & Cluster Delight Cereal blogger campaign by Mom Central Canada on behalf of General Mills. I received compensation as a thank you for participating and for sharing my honest opinion. The opinions on this blog are my own.

Wednesday, June 5, 2013

International Delight Iced Coffee review & giveaway!

I confess, I'm a coffee addict. Even after switching to decaf with my first pregnancy four years ago, I still need my "fix" of hot coffee every morning, and definitely have a mid-afternoon craving for iced coffee every day.

I used to be that person who would drop five bucks here and there at the coffee shop on an iced coffee - always feeling a little guilty about the spend, but so strong was my desire for the luxury of an iced coffee that I justified it to myself.  This is nothing to be proud of, but my daughter is even quite aware of the big green sign that means a yummy coffee for Mummy and a "'Nilla One" (Kids' French Vanilla Creme) for her!

Talk about an expensive habit.

However, thanks to BzzAgent, I have discovered a new way to satisfy my craving for a good iced coffee without spending a fortune!! I was lucky to be selected for the International Delight Iced Coffee campaign, which meant I got to try out their new delicious coffees for free. It comes in Vanilla, Caramel Macchiato (my personal favourite), and Mocha.


These are available at the grocery store at about $5 for a 1.89L carton. Compare that to the $5.67 for a single 16oz (0.47L) "grande" drink at my favourite coffee shop, and there's really no contest in terms of price. Especially if, like me, you pour it over ice and top up with milk - the flavour is strong enough to take a little extra milk, although it's ready to drink as is - it's WAY cheaper.

But, what about the taste? Well, I'm happy to report that I like International Delight's version just as much as the pricey coffee shop version. I'm a bit of a coffee snob, so hopefully that means something.

This savings-conscious mama loves her little luxuries, but if I can save on them, even better. An extra $5 on my grocery bill that ends up saving me $25 or more on iced coffees is a no-brainer! I will definitely be buying this product again and can happily recommend it to you!

Best of all, I have a free product coupon that I would like to share with a lucky Canadian reader.  Feel free to enter the giveaway below and I'll mail it to the winner! Please note, the coupon is only good in Canada, and baby #2 is due on June 20th so I may need some leeway on the end date/mailing date :)

a Rafflecopter giveaway

Friday, April 5, 2013

Wean Green review

Let me say right off the bat that this is not a paid review. I wasn't asked to write it at all. I just wanted to share an excellent experience with a company - so rare these days!

Wean Green is a Canadian company that makes air-tight glass containers. They are perfectly sized for snacks, lunches, or even tiny servings of homemade baby food. The lids come in bright, fun colours like raspberry, carrot, pea and blueberry. Cute, right?

I got some of Wean Green's Wean Cubes about 2 years ago. I got them to use for Mia's baby food when she was starting solids. Eight little Wean Cubes have been in heavy rotation in our kitchen ever since - now that she's well past baby food, we use them for salad dressing, snacks for the purse, cut up carrot sticks, and so on. They've been great.

Then, within the last month or so, two things happened. First, one of the clips on one of the lids snapped off. The lid still seals okay; it's just short one clip.

Then, one day I opened the dishwasher to find that one of the Wean Cubes had absolutely shattered in the dishwasher - just on a normal wash, not high heat or anything. Bear in mind, I have been using the dishwasher to clean these all along. I guess this container just finally gave up the ghost. There was glass all through the bottom of the dishwasher. You know, it didn't occur to me that there might be glass slivers on our dishes or cutlery - I didn't even check. Luckily, there seem to have been no ill effects, so I guess we're okay on that front.

Surprised, I contacted the company on their Facebook page just to make sure that they were dishwasher safe (the packaging had been long ago recycled).

Within hours, Wean Green had responded and asked me to send an email to them directly. Their immediate response to my problem was to describe how they have changed their manufacturing (down to moving to a different country for factory production) and improved their products since my Wean Cubes were made. And beyond that, they offered to replace the products I had.

Wait. Let me repeat that one. They offered to replace products that were two years old and well-used, just to ensure a happy customer. They provided a gift code for me to shop on their site - and when I had some technical difficulties, spent time on the phone with me sorting it out and making sure that my order was placed and on its way.

Within a week I had new sets of Wean Green products, which we are happily using already. And I'm also left with a really positive impression of the nice people and a company that stands by their products. I'm so impressed with their level of customer service. I'm thrilled that they have improved on the original products, and wholeheartedly recommend Wean Green to anyone!


Monday, December 10, 2012

Mashed Potato Pancakes (recipe)

Ever wonder what to do with piles of mashed potatoes left over after a big meal? This makes a great snack or lunch!
 
Mashed Potato Pancakes

1 egg
2 cups mashed potatoes
1/2 cup milk
2 Tbsp water

1/2 cup flour
1 tsp baking powder

1/2 cup grated cheese (optional)
1 Tbsp chopped chives or parsley (optional)

Whisk the first four ingredients together until combined. Add in flour and baking powder and mix well. Stir in cheese and herbs.

Heat a griddle or pan to medium-hot and brush with butter. Pour 4" circles of batter onto the pan and cook until the edges begin to dry (the middle won't bubble and dry the way crepes or pancakes do). Flip and cook until the cake puffs, check for golden brown goodness on each side and they're done!

Serve with sour cream (or ketchup, if your toddler insists)! Makes about 20 pancakes.

Sorry for the crappy picture! I was too lazy to pull out the proper camera and just used my laptop.

Monday, November 26, 2012

Milk Unleashed! (Giveaway)

Hello! It's been a while! Our whole family was pretty much out of commission with that nasty cold. Thank goodness we are almost all better.

Today I want to share Milk Unleashed with you! If you have a little one, you're probably like me and have a stash of snacks ready for even the shortest excursion. Of course, little ones get thirsty, too! I'm not a huge fan of giving straight juice (Mia does get half water, half juice from time to time) like in juice boxes, but it's not always ideal to take a sippy cup with water. Leaky sippies and no nutritional value.

That's where Milk Unleashed comes in! Single serving packs that don't need to be refrigerated combine the nutrition of milk with convenience. They are great for lunch boxes, diaper bags, or, if you're like me, the big giant catch-all purse that stands in for a diaper bag.

Milk Unleashed has a cute little app with fun activities, tips and a fun quiz too!

Take the quiz, it's cute - apparently we are a "Free-Wheelin' Family", ha ha!

So all this fun goodness leads me to a giveaway! Milk Unleashed has a prize pack for one of my lucky readers! The prize pack includes:
  • One liter of Shelf Safe Milk (Grand Pre or Baboo)
  • Three single serving shelf safe milks (white and chocolate) from: Chokeo Chocolate Milk, Grand Pre or Baboo 
  • A calendar and brochure with information about Shelf Safe Milk
  • Cool stickers and Tattoos
  • Plus, one bonus prize! 
Wow! Enter in the Rafflecopter form below (click "Read More" if you don't see it!)

a Rafflecopter giveaway

Disclosure: I received products to try for this blog post, but was not paid to write it. My opinions are my own.

Monday, November 5, 2012

Quick and Easy Quinoa Salad

This is so super easy and delicious, I think I'll be making it a lot more often.

Quick and Easy Quinoa

1 cup quinoa (about 2 cups cooked)
1 can black beans, drained
1 large tomato, chopped
4 green onions, chopped
1 can corn, drained (or use frozen, or leave out)
1/2 cup cubed cheddar cheese
1/2 cup salsa (as mild or hot, chunky or smooth as you like it)
1/2 cup sour cream (go on, use the 14% stuff... it tastes so much better!)
1/2 tsp cumin
1/4 tsp paprika (if you feel like it)

Cook the quinoa as directed on the package (I use my rice cooker, one of my favourite kitchen tools! 1 cup quinoa to 2 cups water).

Mix the remaining ingredients in a big bowl. Add the quinoa when it's cooked. Serve warm.

That's it!

Variations:
  • Great as a meal on its own (a big bowl), or 
  • as a hearty dip for corn chips, or 
  • add some broth and a can of diced tomatoes and heat it up in a pot for soup (leave out the sour cream for that - and add it as a dollop garnish to each bowl)! 
  • Serve it in iceberg lettuce "bowls" for a nice presentation.
Additions:
  • Chopped cilantro (if you like it), or parsley
  • chipotle sauce or chopped chipotle peppers in adobo sauce for some heat
  • lime juice
  • different beans (I like those red mexican beans!)

It is packed with protein, fiber and iron, and suitable for vegetarians, vegans (use soy cheese and leave out the sour cream or substitute whipped silken tofu),

Thursday, September 27, 2012

First Cheerios!

One of the big milestones in any baby's life is starting on solid foods. I know everyone has their favourite methods and recipes for baby's first foods, whether it's homemade organic or store-bought, but I think just about every parent I know included Cheerios in with the first finger foods.

With their high fiber, low sugar, and low fat content, Cheerios are a winner for both parents and tots. The size and shape make them easy to pick up for little fingers (and great for practicing the "pincer grasp", improving fine motor control), and once baby is able to chew, they love them.

I still like Cheerios for breakfast myself - Mia and I often share a bowl. One of her favourite things is to drop Cheerios one at a time into yogourt and eat a bite with both on the spoon. Maybe a little weird, but she likes it!

General Mills (the makers of Cheerios) has a fabulous campaign again this year to celebrate First Cheerios moments. You can join them on their Life Made Delicious Facebook page, and share a photo of your little one enjoying Cheerios - and it may even be included on the special edition 400g Cheerios box, in stores in Spring 2013! What a neat way to commemorate a fun moment in your child's life.

The first 1000 participants receive a coupon for a free box of Cheerios (one per household), and after that everyone gets a $1 off coupon towards your next box (one per calendar year)!

I added my photo to the group and loved seeing the photos other proud parents have submitted. How fun! When I was going through my photos, I realized just how many pictures I have of Mia having Cheerios. Of course, those can't just sit in my files - here's my own little mosaic of her Cheerios moments!


I hope you take advantage of this fun opportunity to share your baby's First Cheerios moment - and get a great coupon as well!

Disclosure – I am participating in the First Cheerios Blog Tour by Mom Central Canada on behalf of General Mills. I received compensation as a thank you for participating and for sharing my honest opinion. The opinions on this blog are my own.

Sunday, September 23, 2012

Rumplesauce

 It's apple season. Our new house has a little apple tree. It hasn't been taken care of (we'll do a heavy prune once it goes dormant), but it still produced 35 little apples this year. I have no idea what variety they are. They were only about 3" diameter, but were sweet, ripe and edible, so we harvested them. Mia helped.

What to do with 35 tiny apples? Applesauce, of course. It took a while to chop them up, but we love homemade applesauce, so it's worth it! (It's much easier with regular size apples :) )

Applesauce is so easy, everyone should do it. Here's how I make it:

Rumplesauce
  • 2.5 quarts of chopped apples. I leave the skins on - that's where all the nutrients are, and I hate peeling. Bonus: if the skins are red, they will turn your applesauce a lovely pink colour!
  • 1/2 cup brown sugar (or to taste). Dark brown is yummiest, but you can use golden or regular granulated white, or honey, or agave... or none, if you don't like it sweet.
  • 1 tsp cinnamon
  • 1 tsp vanilla. Use real vanilla, not simulated flavour. I love Mexican vanilla and am dreading the day when the big bottle we got last time we were down there runs out. I guess that'll mean we're due for another Mexican holiday :)
  • 1 Tablespoon rum (optional. But it's just "applesauce" without it). Use the good stuff. We like Appleton Estates.
Chop the apples finely - about 1/2", especially if you're leaving the skins on. I suppose you could do this in a food processor, or with a grater. I did it the old-fashioned way with a knife.

Add the apples to a 5qt (medium size) pot and add water to about halfway up the apples. Stir in the cinnamon. Pop that on the stove, cover, bring to a boil, then reduce the heat and simmer for a while until the apples get mushy. Check every 10 minutes or so, give it a stir, and add a little more water if you feel like it. These ones took about 30 minutes.

Smash them with a potato masher, if you like lumpy applesauce. I usually do, but these apples were a little grainy - in that case, use a stick hand blender to puree. Add water if the consistency is too thick.

Add in the vanilla, brown sugar and rum, stir.

**If you want to make Rumple Butter, leave the pot on low, uncovered, until the mixture reduces to a spreadable consistency.

Ladle into jars. Freeze what won't be eaten in the next week (leave about 1/2" head space for freezing).
Makes about 8 cups of Rumplesauce. This recipe is easily adjusted for different amounts of apples. Add or use other fruit, if you like! Pears make great sauce or butter (reduce the water as needed, or add berries or even sweet potato (add more water as needed) for a different flavour, whatevs! If you're adding sweet potato, try using orange juice for a bit of the liquid! So yummy.

Monday, September 17, 2012

My go-to easy dinner: Quiche

If you've been reading for a while, you may recall that for 2010 I went eggless. (Why stop eating eggs? click to find out my reasons).

Well, that was an interesting year in the kitchen. I discovered that baking without eggs is really not that hard (check out some of my favourite recipes: Eggless Lemon Loaf, Eggless Chocolate Bundt Cake (so, so good), The World's Best Cookies, Eggless Orange Muffins, and Eggless Cheesecake.) - and the only thing I really, really missed was quiche.

I am back to eating eggs now - I'm still not comfortable with the whole egg production situation, but for now I am guiltily eating free-range eggs. They cost at least twice as much (and still are not kind - read more information about free-run, free-range etc eggs). I would love to find a local farmer who will sell me eggs by the dozen or flat from truly free-range chickens - the picturesque, ideal farmyard with chickens on the loose. Have you seen one lately? I haven't.

Anyway, the point is, I'm back to making one of my favourite dinners: quiche. It's on regular rotation at our house, and I love that it's so versatile. It's the kind of thing you can make for dinner when you're due for a grocery shop and there's not much in the fridge.

Here's my quick and easy recipe, if you feel like giving it a go. Does it look long and complicated? It's not. I just talk a lot.

Yummy Go-To Super Simple Quiche 

Crust:

  • 1 Tenderflake All Vegetable Shortening Deep Dish Pie Shell. 
Maybe some of you have the time to make your own pie crust (it's not that hard), but I'm lazy and want to spend the rare minutes that Mia is sleeping NOT making pie crust. They come in boxes of two, so if you're feeling virtuous, you could make two quiches at once and freeze one (they freeze well). Don't get the regular kind in the yellow box, unless you are okay with lard in your diet (ick). Look for the all-vegetable one in a blue box.

Filling:

  • 1/2 - 2/3 cup grated cheese. I like old cheddar, but any version of cheddar, mozzarella, mexican or italian blend (if you're into the pre-shredded bagged cheeses) will do. Or go funky and use chevre or feta (lovely with a spinach and sun-dried tomato version).
  • 3 eggs. You can't do quiche without these. 
  • 1 cup of milk.  Don't use less. The milk makes it nice and fluffy.
  • 1 cup chopped cooked vegetables. Here's where it gets interesting. I love any variation of mushrooms, onions, asparagus, broccoli, sun-dried tomatoes, spinach (yes, you can use frozen chopped, just thaw and drain it first), something leftover you have in the fridge (bruschetta topping? why not!). 
  • a handful of fresh vegetables or herbs (optional), for example: green onions, chives, parsley and so on.
  • dried herbs, if you like. I love using the Herbes de Provence that we got in (ahem) Nice. 1/2 tsp does nicely. But feel free to toss in some dried oregano (don't go crazy, that's strong stuff), basil, paprika, whatever floats your boat.
  • a couple pinches of salt. Not quite 1/8 tsp. 
  • Pepper if you like it.
Cook the crust according to package directions. That is, thaw it, poke it with a fork all over, stick it in the oven at 400F for 8 minutes. Near the end, take a look and if it's puffing up, poke it again.

Meanwhile, cook the vegetables if they're not already cooked. I don't care how you do it: steam, saute, microwave, whatever. And, grate the cheese, and chop your herbs if using.

Beat the eggs, and mix in your milk, herbs (dried or fresh) and salt and pepper if using. 

Take out the crust and decrease the oven temperature to 375F, put half the cheese in the bottom, then your veg, then the rest of the cheese, then pour on the egg mixture. Here's an extra yummy tip: drape some of your grated cheese all along the rim of the pie crust. It makes the crust taste like cheese straws. Nobody leaves the crust behind when it tastes like cheese straws.

Pop that back in the oven for 35-40 minutes. Put an old cookie sheet underneath if you're worried about it leaking over the edges. I hate cleaning my oven, don't you?

Check for doneness by poking a sharp knife in the center. If you see milky fluid, it's not done. If you see clear, it's done!

Serve that puppy up warm or cold with some steamed vegetables or a nice salad. Yum!

(Like all my cooking, this is a vegetarian recipe - but if you're into it, you can always add some chopped cooked ham or chicken to replace part of the 1 cup of cooked veg). Another note: yes, I do know cheddar has rennet in it and so is not actually a vegetarian product. Use a soy cheese if you're not okay with rennet. 

Thursday, August 23, 2012

Playtex Twist 'N Click Snacker and Bowl Review

As any toddler's parent knows, snacking is suddenly extremely important. A hungry toddler is a CRAZY toddler, if mine is anything to go by. She gets whiny, cranky, and wild if she does not have snacks!

Some days it feels like all I do all day is prepare food, with three meals and three snacks each day (okay, the last snack is just my hubby and I after Mia's gone to bed! ha ha!). And on days when we have errands to run or anything that takes us out of the house for any length of time, it can be a challenge to make sure Mia gets a healthy snack before the meltdowns begin.


So anything that makes it easier gets my attention! Playtex has a couple new products that do just that.
Mia knew these were for her and could not keep her hands off even for a moment!

The Twist 'N Click Bowl comes in a set of two (suggested retail of $7.99 in Canada). It has an audible click when the lid is properly sealed, and is guaranteed leak-proof! It has a spot for a name on the bottom in case you are sending it to day care or school, for example. It's just the right size for a child. Mia is not a big eater and would probably not finish a whole bowl at this point, but it's a great size for taking along to the beach, errand run, hike, long drive, or any time you might want a bit of snack for everyone (I confess, I like to share Mia's snack most times!). I think in future it will be a perfect size for packing in her lunch for school as well. 

The Twist 'N Click Snacker (suggested retail of $5.49 in Canada) is a great design for a snack container. It has a snap-on lid that twists around to the base, so food stays fresh when it's closed and it acts as an extended handle and a sturdy base when it's open. The lid that stays screwed onto the cup has a flexible opening that little hands can easily reach through for grabbable snacks. And the screw top has a nice feature of an arrow that points to where you want to tighten it to for the best seal. It's nice and light, easy for Mia to hold with the handle, and it is tough.


 Here is the Twist 'N Click Snacker in action. Mia can open the snap lid herself and twist it around to the base. She quickly got the hang of reaching in and pulling out the cereal I'd put in there for her. And the lid of the Twist 'N Click Bowl makes a great plate, apparently! I just hope the cereal all made it into her mouth and not down between the couch cushions...

 Here's the arrow that indicates the area for the best seal. You can't see too clearly, but it's really obvious where you need to close it to on the bowl.

Mm, perfect for strawberries!
 My favourite bits? I love that these are durable, portable, leakproof, and dishwasher safe. I love the fun colours they come in, too! We got the lime green and hot pink combination - nice and bright.

I also like that the Snacker doesn't spill the goods even when tipped over... My daughter can't remember to keep things upright at this age. 

Overall, great products. I'm torn between which I like best. I think the Snacker has fun functionality, but the Bowls might be more practical in the long run.

Mia's current favourite snacks are: berries, fish-shaped cheese crackers (or any kind of cracker, really), dry cereal, pudding (bad mum!), those squeezy applesauce pouches, hard-boiled eggs, olives, buttered toast fingers, and baked marinated tofu cubes.

 I could use some more inspiration. Mia's diet is pretty varied, but I tend to head for the same easy snacks time after time... What are (or were) your toddler's favourite snacks?

Thursday, July 12, 2012

Always read the label!

A couple days ago, it was super hot (yes, Calgary does get heat waves!), so we went to the splash park with friends.
gratuitous cute baby at the water park shot
Super fun for Mia, I was chasing her all over as she ran from one water feature to the next.

On the way, I stopped to pick up a drink and a sun hat for her. The store had two options for drinks in the coolers: pop, or Vitamin Water. I chose Vitamin Water as I don't care for pop, and it seemed a healthier option. I picked the tropical citrus one, thinking of refreshment and not really noticing the name of that flavour: Energy.

On the way home, chugging back the last of my drink, I noticed on the label:

Not recommended for pregnant or breastfeeding mothers

Ughhhh! I'm still nursing Mia a LOT - like probably 15+ times a day she has milk still (and yes, she's 17 months old and no, I have no plans to wean her). I guess it was because this product contains caffeine. I hadn't even noticed. I know that a little caffeine is not going to be a big problem, but I'm not cool with drinking it unaware. And there is the lesson: Always read the label.

The lesson that I didn't actually learn, apparently.

 I just popped open a bag of sea salt and lime Crispy Minis rice cakes as a somewhat healthy snack. They were on sale this week - we don't normally buy them, but the sale price tempted me. After chomping down about 3/4 of the bag, I check out the nutritional facts. 12 of these tiny tasty treats equals 90 calories. A bag is 100 grams. So I just popped about 340 calories of this non-food. They're not particularly filling, and have little to no nutritional value. That was dumb!

This isn't a dramatic story or anything, but more of a reminder to pay attention to what you're eating. Hopefully I will do a little better from now on with reading labels!

Tuesday, April 17, 2012

A Supreme Green Mess #FinishRevolution

This week I have been trying out a few new recipes from my stash of cookbooks. One of the ones I tried was Supreme Green Spaghetti, from my Vegetarian Times Complete Cookbook. Usually I love the recipes from Vegetarian Times - they can generally be relied upon to transform simple ingredients into delicious dishes. I was eager to test out the Supreme Green Spaghetti, because it looked so healthy and simple.
Well, it was simple and fairly healthy alright, but seriously devoid of flavour and had a disappointingly grainy texture! I usually happily modify recipes after the first by-the-book test - but this one is just not worth it. So I won't bother sharing it (it's not even on the VT site). Suffice to say, it involved blending cooked broccoli and spinach with milk, butter, salt and garlic to create a sauce for whole grain spaghetti. And even though I love all those ingredients, it was a mess. Not particularly tasty, the raw garlic had too much bite (although I'm a garlic lover), the texture was icky.

The only one of us who enjoyed it was my 14 month old. Bland pureed vegetables are okay with her.  My husband barely ate five bites - he said he wasn't that hungry, but I know he was sparing my feelings. And I managed half a bowl before giving up. The next day I added some organic tomato sauce to the dish and tried again, it was still not worth eating.

It's not too often that I create an absolute unsalvageable failure in the kitchen, but it does happen!

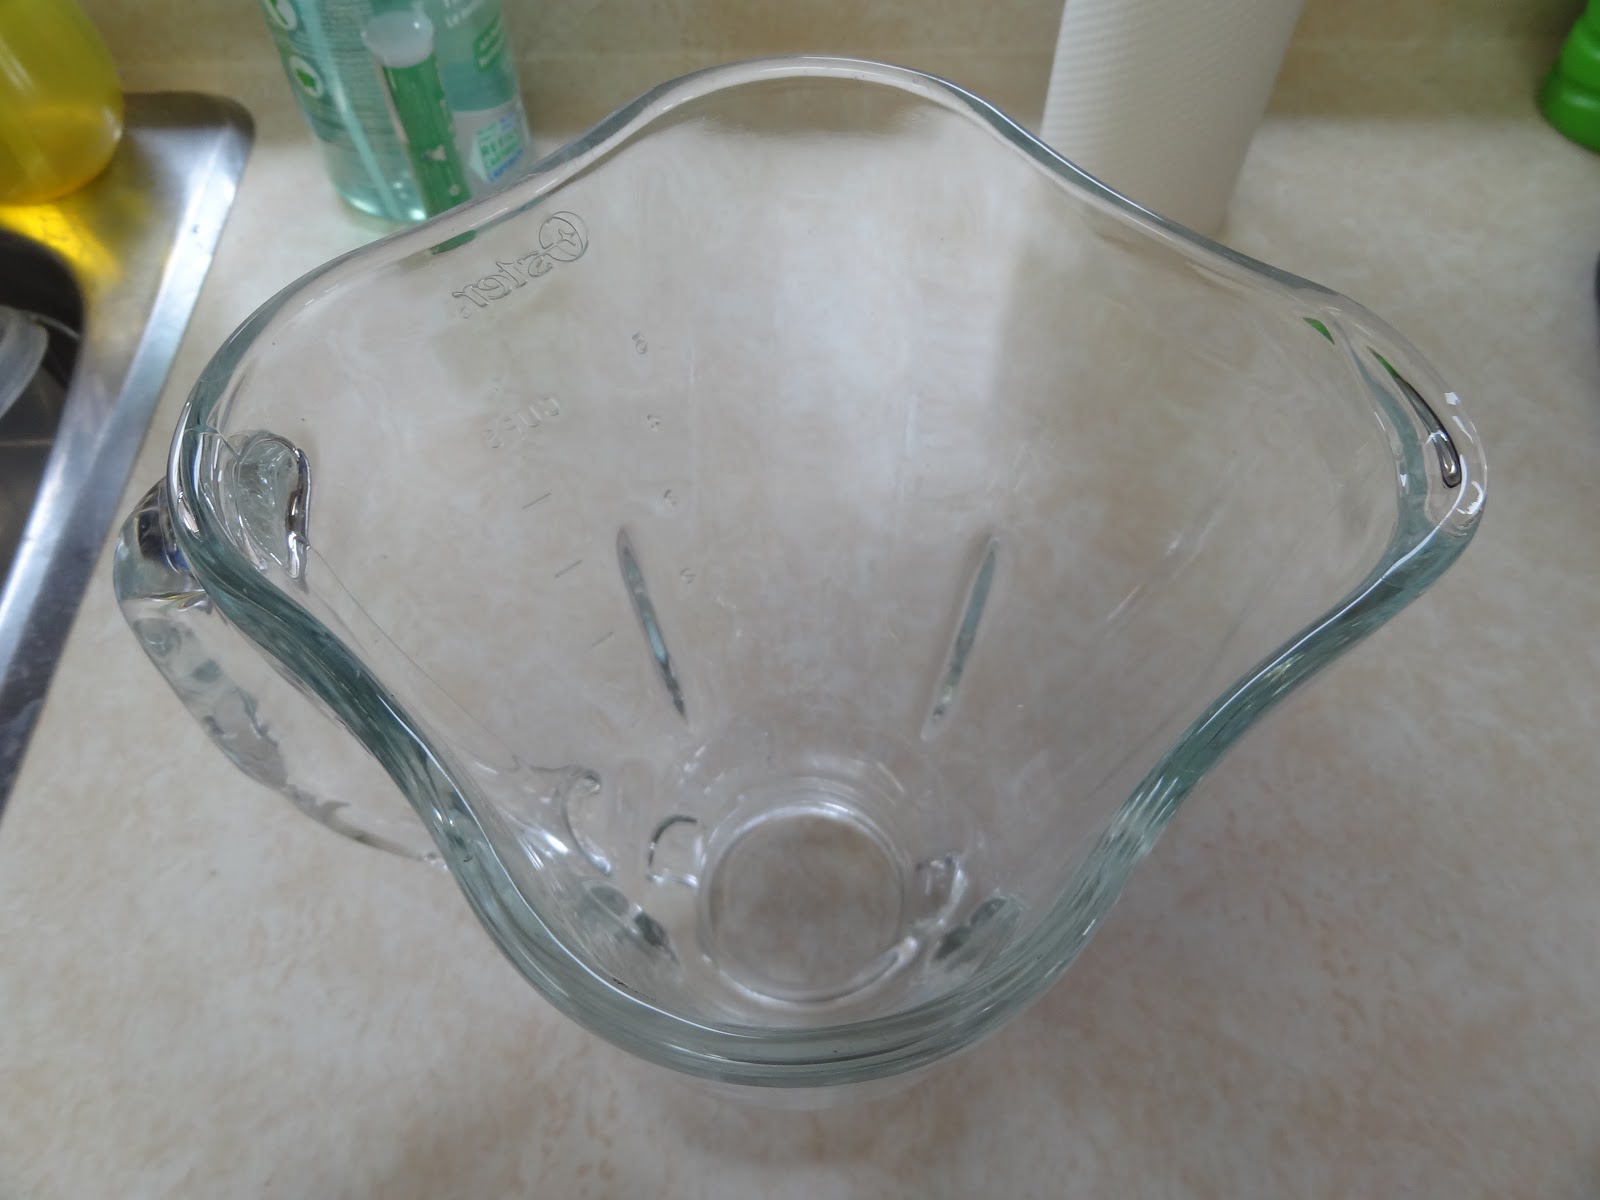
At any rate, the mess of a dinner came with a mess of a blender as well.  The blended bits of broccoli and spinach are exactly the kind of thing that tend to dry on and stick like glue to dishes. The dishwasher in our grotty rental house (we're moving by the end of the month to the new house, hooray!) is an old beast and does not do a great job by any means. So this was a big test for the Finish Quantum dishwasher tabs that I've been trying out. Here's the blender as it went in to the dishwasher:


 ...and that is how it sat in the dishwasher for four days. We're a small family of three and weekdays, as my husband only eats one meal a day at home, we take a while to fill up the dishwasher. So there it sat until we finally had a full load.

Oh, the suspense. Would I be washing that blender by hand afterwards? I HATE hand washing dishes, so I really was hoping for the best.

Well, you can stop biting your nails with anticipation - here's the result, fresh out of the dishwasher. Sparkling clean!


I am positive the tabs I was using before (store brand green tabs) would have left not only dried-on bits of green goo but also detergent residue on the glass. So I am quite happy with this result. If only we'd gotten a tasty dinner out of it!

Disclosure: I am part of the Finish Blogger Program by Mom Central. I received compensation as part of my affiliation with this group.  The opinions on this blog are my own.

Saturday, December 24, 2011

Holiday Appetizers

I haven't done a food post in a long time - mainly because I find cooking with a baby in the house is a quick and dirty affair. With my husband home for the holidays, we're getting a little time in the kitchen as we spell each other off on daughter care!

My husband made these rockin' Vegetarian Chick Pea Pot Pies (a lot of work, but they are so worth it... delicious!), and we were left with about a quarter package of extra puff pastry. Hmm!

I made some Stuffed Mushrooms -
  • 2 dozen large button mushrooms, of uniform size, cleaned
  • 1/2 cup cream cheese, softened
  • 2 Tbsp grated Romano or Parmesan cheese
  • 1/4 cup roasted red peppers, finely chopped
  • 2 Tbsp sun-dried tomatoes, finely chopped
  • 1 Tbsp chopped parsley
  • 1 tsp dried roasted garlic, if you have it handy (or the real thing, or none)
  • salt and pepper to taste
Pop the stems out of the mushrooms (and reserve for another use!). Lay the mushrooms bottom up in an ungreased baking dish with a rim - or, better, on a cooling rack placed over a rimmed baking sheet. These lose a lot of liquid while baking.
Drain the chopped peppers and tomatoes in a sieve to help keep the moisture down, as you don't want your mixture to be too wet. In a small bowl, mix the cream cheese with the grated cheese, and stir in the rest of the ingredients. Spoon cheese mixture into mushroom caps. Bake at 350F for 15-20 minutes and then broil until browned. Try not to forget about them under the broiler like I did (oopsie!) - unless you want dibs on the burnt ones! - give them about 4-5 minutes tops for broiling.
With the red, white and green filling, these are pretty at Christmas (or any time)!

Now, what to do with those mushroom stems and leftover puff pastry?? How about another appetizer?

Chipotle Mushroom Puffs

1 cup of finely chopped mushrooms (stems work just fine!)
1 small onion, finely chopped
1/4 cup grated cheddar
1-2 tsp of chipotle sauce OR 1/2 chipotle pepper, finely chopped
salt and pepper to taste
1/2 package of puff pastry (225 grams)
1 egg


Saute the mushrooms and onions in a bit of oil (I used oil from the sun-dried tomatoes - why not!) until soft. Allow to cool. Mix in the remaining ingredients. On a floured surface, roll the puff pastry out into a rectangle and cut it into 2" squares. Drop a dollop of mushroom mixture onto each square. Brush the edges with water and bring up corners to make a pouch. Pinch the edges together to seal. Transfer to a parchment paper lined baking sheet and refrigerate for 30 minutes.
In a small bowl, beat the egg with 2 tsp water and brush over the pouches. Bake at 425F until golden brown and puffed, about 15 minutes.

Yum, yum!

I will not tell on you if you sip Baileys and chocolate milk while cooking. I may have had to do a little of that myself.  :)

Friday, December 16, 2011

Meals for a non-eater - help!

Two blueberries, three Rice Krispies and a half teaspoon of yogourt. 

No, it's not some crazy fad diet - that's what my 10 month old daughter ate for breakfast, refusing all else.

Lunch? I am not sure but I think she may have swallowed a minute amount of egg salad, possibly a teeny bite of bread and definitely the juice from a clementine segment (but not the solid part of the fruit).

And this is why she's still up at least 3 times a night to nurse and nursing so frequently during the day.  It's not that she's a picky eater per se - she loves pizza, pasta, and will try anything we give her - tonight she tried sushi and tempura (vegetarian of course), and she doesn't balk even at spicy food. She just doesn't eat much. And yes, I've tried the blander foods too - rice cereal, applesauce, banana, whatever... She'll eat a little but not much before she starts refusing it.

I know that "food is fun" for the first year, and I'm not concerned about her weight (at all.. she's still in the 90's, percentile-wise and moving on up to 18 month size clothing at just 10 months!), but I would be happy if she would sleep longer at night and stop nursing quite so much at night. Nursing at night means she also needs diaper changes twice during the night. I love our cuddle times at night, but... I'd love some sleep too.

She loves playing with food, tearing it apart, and completely understands how to get it into her mouth and eat it, though sometimes she spits it out and sometimes she just plays or tosses it to the floor and doesn't put more than a bite or two into her mouth. She will sometimes take a spoonful or two of softer stuff (yogourt, applesauce, cereal, soup, etc) but it's rare for her to eat more than, say, a tablespoon of anything. She will happily take small bites of things we hold out to her (banana, sandwiches, pizza, etc).

I don't want to force it on her and usually stop when she starts turning her head and pressing her mouth closed. I will try again a few minutes later, and again, and again - with different foods sometimes - but never make her eat or shove things in her mouth. My husband is more likely to pop things in there when she's not quite expecting it.

She is teething, but I am not convinced it's a teething issue as she's never eaten very much, especially compared to the other babies I know.

So, faithful readers... hit me up with some advice on getting Mia to eat some more.

Thursday, October 27, 2011

Getting out with the baby

We are back from our trip - more on that later (I'm trying to get a quick post in while Mia sleeps!). 

I'm trying to get out more - for my own sanity and for Mia to see some new things and meet some new friends. We already go to Mum and Me Aquafit, a Baby Goose program at the library, and a Mother Goose program run by a community group. Her dad takes her to Parent and Tot swimming as well.

Yesterday we went to one of the Baby and You cooking classes put on at the Real Canadian Superstore and sponsored by Huggies. (As you know, we cloth diaper, but we do use Huggies when we are travelling - did you know you can buy them in Spain?). It was a free, drop in class where we made two recipes, had coffee and tea, and some fun with other mums and their babies.

The recipes were for quinoa pancakes (delicious - though the recipe called for too much milk! oops! and too much baking soda, in my opinion - they had a salty flavour), and for a sweet potato bake that was also yummy. Mia loved them both and we had fun trying to do one-handed mixing and egg-cracking with the other mums - with a baby in one arm, you really only do have one hand to cook sometimes!

Huggies provided cute tiger ear headbands for all the babies, and Tigger stuffed toys for some. They held a draw at the one we went to for the Tiggers, since there weren't enough for everyone. We also took home a couple of the new slip-on diapers to try out. I'm not convinced it's a good idea... that could get really messy, in my opinion.

Anyway, it was a nice way to spend the morning and I recommend checking it out if you feel like getting out with your little one. There's a list of the locations here on their Facebook page.

I really love things we can do together that are free and fun. What do/did you do with your baby?

(this is not a sponsored post!)

Thursday, September 22, 2011

Food, glorious food!

Today I want to direct your attention to The Muffin Myth, because I just came across it (thanks to Everything Mom) and once there spent a blissful half hour reading old posts. Beautiful, friendly writing and inspired recipes.

I made the Chickpea Salad from Katie's blog last night and we devoured it on bread with soup for dinner; now I'm gobbling it on crackers for lunch. So. Good.

ps try it on homemade crackers - I promise, they're so easy to make - and so yummy you'll want to make them often!

Wednesday, September 14, 2011

Keurig Review

I recently had a chance to try out a Keurig machine, thanks to BzzAgent. I've seen these types of machines in the stores and at friends' houses and been curious. I'm a hot beverage NUT so I really wanted to try this out.

The machine is good looking, silvery and black, and fit in just fine in my kitchen. I did find it was fairly large, but that's all relative. It's around the same footprint as my Krups machine (I've talked about that here), but much bigger than the Sunbeam Hot Shot that I had been using to make hot water (until it died after several-times-a-day use for three years. Psst, Sunbeam, I need a new one and I can't find it in Canada!)

The Keurig can do coffees, teas, hot chocolate and even cider - it all depends on the cartridge you put in. And without a cartridge it does a quick cup of hot water (perfect for random stuff like nursing teas and the salted caramel hot chocolate I like to make). You can select a small or large cup size to fill. I did notice that the amount of water it dispenses seems to vary - a small cup can be 2/3 or 3/4 full, seemingly at random.

The machine comes with 12 samples of assorted cartridges. I'm not sure if they're all the same in each box but mine included 11 different coffees and one tea. In the spirit of giving it a good try, I tried each one. I am a super picky coffee drinker and had switched to decaf nearly three years ago so having caffeinated coffee was a bit wild for me. Honestly, I was not crazy about most of the coffees, but I did find one or two among the selection that I liked. And with hundreds of different varieties available, there is sure to be something for everyone.

I have to say I really didn't like the tea sample. I found it bitter. I'm something of a traditionalist when it comes to tea. I need steeping to bring out the flavours. So that for me was a disappointment. I actually tipped it out after tasting it and made a new mug with a tea bag instead.

And the whole cartridge thing leaves me cold. I mean, cute packaging, and it's SO convenient, but what a lot of waste. They can't be recycled or composted, so with every drink a big chunk of garbage is created. I have talked about that before.  I would feel better about these if they were biodegradable, at least.


Okay, so what did I love about the machine? The convenience. If you can find the right coffee cartridge for you, and the whole wastefulness of it isn't enough to put you off, it is so freakin' easy and quick. The water heats up really fast and your drink is ready sooner than you'd ever get it with a traditional drip, percolator, or even a kettle. It's about the same speed as my beloved late lamented Sunbeam Hot Shot, with a slicker look and easier use (no spilly filling of water each time for the Keurig - you just fill the tank on it every once in a while and it lets you know when you need to). It is so convenient and also kinda fun to pick out a drink and make it, just like that. I imagine if a few people in a family like hot drinks it would be even more excellent. For us, I'm the only one (my poor husband is actually allergic to coffee and is not fond of other hot drinks). I can't emphasize enough how easy it is to use.

If you are that person who actually buys a coffee at a shop every day, this would be a money saver for you.  The cartridges are around 50 cents each, from what I understand.

Overall... love the ease, hate the waste. I'm currently using it for hot water only and for that purpose it seems too big (oh, Sunbeam Hot Shot! I miss you). I hear you can get a good deal on the cartridges at Costco, but I look at them and think, "That box is full of landfill" - and can't buy them. If only I could feel okay about where the cartridges go after use, I'd probably be a solid convert.

Tuesday, September 6, 2011

Busy and unprepared for travel!

I've been keeping busy just being a mum lately. Someone's having super short naps (35-45 minutes) so I'm not getting much done - a little baking here and there to keep me sane. Somehow baking has always been my go-to pursuit when I need some Me Time. There's something so satisfying about whipping up a coconut loaf, muffins or cake. It takes hardly any time, really, to prepare, and you end up with something so yummy!

We are looking forward to taking a Mediterranean cruise next month - Barcelona to Monaco, Rome, Pisa, Sicily, Naples, Palma de Mallorca and Marseilles. Mia will be about 8 months old for her first very long flight (those flights to Calgary and back were just practice) and her first European vacation. Too bad she won't remember any of it when she's older.

The cruise is coming up so fast and we're a little unprepared. So if you have any must-see sights in any of those cities, let me know! We'll be in Barcelona for 4 days, pre-cruise. Here's our list so far:

Barcelona: Sagrada Familia, Park Güell, Mercat de la Boqueria
Monaco: ???
Rome: Colosseum
Pisa: the Tower, of course - from the outside only as children aged under eight are not allowed in.
Sicily: Cattedrale di Monreale, maybe...???
Naples: ???
Palma de Mallorca: Cathedral (Le Seu)...???
Marseilles: ???

Yeah, we need to do some planning! Suggestions welcome!