Showing posts with label recipe. Show all posts

Tuesday, June 20, 2017

Instant Pot Cowboy Beans and Rice Burritos

Sometimes you just want a burrito!


This Instant Pot recipe makes super fast, inexpensive and easy burrito filling. It is even kid-approved: my six year old ate two, and my four year old had no complaints (a rare dinner!). You will find it easy to make, healthy and nutritious!

My version is vegetarian as I use a veggie "ground round", but you can certainly make it carnivore-friendly by using ground beef, and I've included instructions for that.

This version is also on the mild side. If you want to spice it up, here are some ideas: use chipotle sauce instead of barbeque, add more chili powder (or some cayenne), add a small can of jalapeños, or chopped fresh jalapeños as a topping, or hot salsa.

I used roti instead of tortillas, which added a really nice flavour and I recommend giving them a try for the wraps. I picked them up at Walmart of all places - $2 for a pack of 10 which is about half the price of tortillas where I live!

I've mentioned this before, but I love my Instant Pot. I use it pretty much daily, and it has make cooking fun again! This is an affiliate link for the 6-quart pot, which I have; I find it perfect for our family of 4. Most meals we end up with leftovers, which I freeze for busy days when dinner seems daunting.

INSTANT POT COWBOY BEANS AND RICE BURRITOS


Filling Ingredients:

-->
·      ½ onion, diced
·      1 Tbsp oil
·      1 stalk celery, chopped
·      1 c. tomato juice
·      1 c. water
·      1 tsp chili powder
·      ½ tsp salt
·      1 tsp barbeque sauce
·      1 19 oz can beans, drained and rinsed (I used a 6-bean blend; use your favourite or whatever you have handy!)
·      1 c. white rice, rinsed
·      1 lb veggie ground round  (**I use Yves Cuisine veggie ground round, which is pre-cooked. You could use lean ground beef if you prefer.)

To Serve:

·      Grated cheddar
 ·      sour cream
·      Tortillas or roti

1.     Press Sauté button on Instant Pot, wait until it reads Hot, then add oil. Sauté onions until translucent. (** If you are using ground beef, add it with the onions and cook until it is brown and crumbling, then drain any grease off.)
2.     Add remaining ingredients in order. Crumble the ground round onto the top of everything else. Press it lightly so everything is submerged in liquid, but don't stir. Press Rice button and set vent to Sealing.
3.     When finished, allow to naturally release pressure for 10 minutes (that means just leave it alone after it beeps for 10 minutes!). Carefully release the vent to the Venting position, release remaining pressure and open lid. Stir to combine.
4.     Put in tortillas with grated cheese, sour cream and any other desired toppings to serve.

Optional toppings:

 Chopped tomatoes, peppers, lettuce, green onions, cilantro, salsa, whatever you like!


If you try this out, I'd love to hear how it turns out for you! 

Tuesday, May 2, 2017

Instant Pot Tomato Soup

When I learned about the Instant Pot, I knew I needed one immediately. And since I got it three months ago, I have never regretted the splurge. I love it and use it many times a week. Money well spent!

I have the DUO 60. It makes yogourt (delicious, easy yogourt), cooks rice, meat, soups and stews, steams, and even makes cheesecake! Amazing. Pressure cooking is new to me, and I've been having a lot of fun experimenting with new recipes.

Tonight, the kids wanted tomato soup, and we had no cans in the cupboard. Instant Pot to the rescue! I whipped up a batch of homemade in very little time. So here it is - vegan (leaving off the sour cream and using veggie broth), easy, fast and adaptable, as well as kid-approved (my three and six year olds gave it the thumbs up!)


INSTANT POT TOMATO SOUP

makes approximately 1 litre

¼ cup cashews
1 stalk celery, chopped
1 small onion, chopped
1 carrot, chopped
2 cloves garlic roughly chopped
½ Tbsp basil 
1 Tbsp olive oil

1 28 oz can no salt diced tomatoes
1 ½ cups boiling water + 1 veggie bouillon cube  (or 1.5 cups veggie/chicken broth)
1 ½ Tbsp oats
1 Tbsp nutritional yeast
 
Press Sauté on the Instant Pot with the liner in. Wait until it says Hot, then add the olive oil, and sauté the first six ingredients until onions are soft and translucent.

Add remaining ingredients. Set your Instant Pot to Manual, turn the dial on the lid to Sealing and adjust time to 5 minutes on high. Do a Natural Pressure Release of 10 minutes (ie, leave the pot alone after it beeps until it reads L00:10, or set a timer) then release the pressure by opening the lid dial to Venting.

Open carefully and use an immersion blender until you have a smooth consistency.

ADAPT IT:

I served with a dollop of sour cream and a dash of freshly ground black pepper. Fresh basil would be a nice addition. Or Parmesan. Or grated cheddar. Or cooked, shredded chicken.

Use the veggies you have. No carrot? No worries. Add chopped red pepper, spinach, kale, zucchini, whatevs! Public Service Announcement: if you hate carrots like I do, don't worry - you can't taste the carrot!

Cashews, nutritional yeast and oats are totally optional! They add depth of flavour, and the oats and cashews add vegan creaminess, but if you are fresh out of cashews, think it's weird to add oats to soup, and don't have nooch in the pantry, that's perfectly okay!

Increase the recipe at will, but remember not to fill the inner pot over 2/3 full for pressure cooking (no matter what the Max line says!). If increasing ingredients, there is no need to increase cook time.

Monday, February 17, 2014

Birthday girl

Oh, my, it's been a while. It is amazing how much energy and time two little ones take! My son, now just coming up on 8 months old, has been teething (enough said!). My daughter has just turned three (how did that happen?!). How time flies!

This is just a quick post to share some images from my daughter's birthday. We did a pirate princess party (I had no idea these were so popular, and can thank Pinterest for a lot of the ideas I used at our party!). It was two hours of madness: 14 children and assorted parents. The power went out for 40 minutes in the middle - thank goodness it didn't affect us too much.

I borrowed a giant Wilton cupcake cake pan from a neighbour for her birthday cake. I used the recipes for Dark Chocolate Cake and Raspberry Jam Buttercream from Food.com, and they turned out wonderfully. Unfortunately for ME, every slice of cake and every mini cupcake was gone by the end of the party! On the plus side, I'd made double the batter, thinking I'd need it, and ended up with an extra dozen large cupcakes as well as an 8x8" cake in the freezer. Phew! Personal chocolate crisis averted.

I learned a couple of things about the pan before I baked, and I'm going to pass on these tips for anyone baking a giant cupcake cake with the Wilton two-part pan.  First, turn your oven to 325 degrees rather than 350. Cover the dome side with oiled foil before baking, and remove it after the first half hour. Test after 40 minutes or so, but mine took an hour to cook fully both sides. Apparently you need two cake mix boxes to fill the pan, as the base takes 3 1/2 cups of batter, and the top 2 1/2. But, if you use the truly delicious recipe above, you only need one batch worth (unless you just want loads and loads of cake, which really is okay in my books.

Here's my sweetie before the party:

Love that girl!

Monday, March 25, 2013

15 minute Homemade "Skor" Bars!

First, a great recipe :) I got this one from my mum. I have no idea where she got it. I made these today, seriously, in 15 minutes including clean-up. They take a while to set in the fridge but are so yummy for so little effort.

Homemade Skor Bars

24 saltine crackers (salted)
1 cup butter
1 cup brown sugar
1 cup chocolate chips

Preheat the oven to 350F. Line a 13x9" baking pan with parchment paper or foil, and lay the crackers out in a single layer, touching. I find 6 rows of 4 is about perfect.

Melt the butter with the brown sugar in a sauce pan, stirring until smooth. Bring to a boil and boil for 2 minutes, stirring constantly. Then pour it over the crackers and even it out. Bake for 5 minutes.

Sprinkle the chocolate chips evenly over the top and pop it back in the oven for 2-3 minutes, just long enough to melt the chips. Use a spatula to spread out the chocolate evenly.

Stick it in the fridge or freezer to chill until set. Cut into 1" pieces  (or bigger, but they are really quite sweet and not exactly good for you, so a tiny indulgence is just about perfect).

These store in the fridge, and freeze exceptionally. They're great little treats, and also good for including in Christmas tins or other gifty occasions.
 _____

I've been so exhausted with our emotional, challenging, charming and affectionate two-year-old, this pregnancy, and coming down with every cold that crosses my path at various play groups. Mia's still not sleeping through the night... we are back to usually two wakings a night. We're working on potty training as well. Is there a stronger word than exhausted?

I've written about a hundred posts in the last month or so, all in my head in the middle of the night. So here are the topics I've been thinking on. Let me know if you want me to expand on any of these and I'll see what I can do.
  • divorce, and the difference between a perception of a relationship and the reality of one. I sometimes think about my previous marriage and realized that I am a little bitter about the way people viewed the end of that. I have never really shared my perspective on it, and while I hate holding a grudge, it does bother me that people seem to make assumptions about what happened without knowing the whole story. Anyway. That's been on my mind. And maybe is way too personal to write about in such a public place.
  • the second pregnancy and how it differs from the first. Boy, is it different. For lots of reasons. And I think that's kind of interesting, and unexpected (to me). 
  • circumcision. A whole world of debate. Everyone has an opinion on it!
  • potty training. But then, everyone writes about that, don't they?
  • renovations. yes, they continue, in a different way - we've just had to replace the roof. That's kind of an interesting story, but perhaps not one I can get into entirely, as we're in litigation over it. But I also never did post after photos of the kitchen and bathroom renovations, which are (thankfully) complete - and that's a whole other story!
  • the world of secondhand shopping and how the internet keeps changing it. Things are so different from when I used to shop 'vintage' as a teenager. Okay, that was (ahem) 20 years ago, but I keep coming across new ways to find what I need for cheap, and that's cool. 
  • and, some recipes for quick and yummy dinners
Well, I can't remember the rest. Seems like every night after Mia wakes up at 3am it takes me a while to get back to sleep and I'm writing essays in my head. And I guess I've forgotten a lot of them.

Monday, December 10, 2012

Mashed Potato Pancakes (recipe)

Ever wonder what to do with piles of mashed potatoes left over after a big meal? This makes a great snack or lunch!
 
Mashed Potato Pancakes

1 egg
2 cups mashed potatoes
1/2 cup milk
2 Tbsp water

1/2 cup flour
1 tsp baking powder

1/2 cup grated cheese (optional)
1 Tbsp chopped chives or parsley (optional)

Whisk the first four ingredients together until combined. Add in flour and baking powder and mix well. Stir in cheese and herbs.

Heat a griddle or pan to medium-hot and brush with butter. Pour 4" circles of batter onto the pan and cook until the edges begin to dry (the middle won't bubble and dry the way crepes or pancakes do). Flip and cook until the cake puffs, check for golden brown goodness on each side and they're done!

Serve with sour cream (or ketchup, if your toddler insists)! Makes about 20 pancakes.

Sorry for the crappy picture! I was too lazy to pull out the proper camera and just used my laptop.

Friday, November 16, 2012

For what ails you... (recipe)

Mia and I got our flu shots on Wednesday, and I'm not saying there's a causal effect, exactly, but we're both sick now. Granted, Mia had a cold before she got the shot. But she's been downright miserable since - waking on Wednesday night every two hours, and last night every hour.

I caught her cold, I guess, and I've been nauseous, with a killer headache, sore throat, stuffy nose, and so, so darn tired. If only I could catch a decent night's sleep! And if she would only sleep more than an hour during the day... Oh, Mia.

Anyway, I'm not into medicating, so here's my alternative cold treatment. Good enough for any time, but especially good when you're feeling off.

What Ails You Tea

3 slices lemon
1-2 slices fresh ginger root (or 1/8 tsp ground ginger if you don't have fresh, but fresh is best)
2 tsp honey (or maple syrup, or brown sugar to sweeten, but honey has antibacterial properties)
a pinch cayenne pepper

Steep in 2 cups of boiling water for 3-5 minutes.

This can be served hot and steamy, or chilled.

Toddlers (past 1 year of age, if you're using honey) can drink it, too. Don't add too much (or any, if you worry) cayenne for children under 2 years old. I feel that the tiny pinch within 2 cups is okay for my 21 month old, but use your judgment.

Why does it work?

Lemons help with throat infections (it is an antibacterial), respiratory ailments, and reducing the body temperature. They are full of Vitamin C, B, and flavonoids (antioxidants).

Ginger is helpful for nausea. It has anti-inflammatory properties and is a natural painkiller.

Honey is a natural antibacterial, antioxidant and antiseptic.

Cayenne - the capsaicin in cayenne helps relieve pain and may help with heartburn and blood circulation.

Monday, November 5, 2012

Quick and Easy Quinoa Salad

This is so super easy and delicious, I think I'll be making it a lot more often.

Quick and Easy Quinoa

1 cup quinoa (about 2 cups cooked)
1 can black beans, drained
1 large tomato, chopped
4 green onions, chopped
1 can corn, drained (or use frozen, or leave out)
1/2 cup cubed cheddar cheese
1/2 cup salsa (as mild or hot, chunky or smooth as you like it)
1/2 cup sour cream (go on, use the 14% stuff... it tastes so much better!)
1/2 tsp cumin
1/4 tsp paprika (if you feel like it)

Cook the quinoa as directed on the package (I use my rice cooker, one of my favourite kitchen tools! 1 cup quinoa to 2 cups water).

Mix the remaining ingredients in a big bowl. Add the quinoa when it's cooked. Serve warm.

That's it!

Variations:
  • Great as a meal on its own (a big bowl), or 
  • as a hearty dip for corn chips, or 
  • add some broth and a can of diced tomatoes and heat it up in a pot for soup (leave out the sour cream for that - and add it as a dollop garnish to each bowl)! 
  • Serve it in iceberg lettuce "bowls" for a nice presentation.
Additions:
  • Chopped cilantro (if you like it), or parsley
  • chipotle sauce or chopped chipotle peppers in adobo sauce for some heat
  • lime juice
  • different beans (I like those red mexican beans!)

It is packed with protein, fiber and iron, and suitable for vegetarians, vegans (use soy cheese and leave out the sour cream or substitute whipped silken tofu),

Sunday, September 23, 2012

Rumplesauce

 It's apple season. Our new house has a little apple tree. It hasn't been taken care of (we'll do a heavy prune once it goes dormant), but it still produced 35 little apples this year. I have no idea what variety they are. They were only about 3" diameter, but were sweet, ripe and edible, so we harvested them. Mia helped.

What to do with 35 tiny apples? Applesauce, of course. It took a while to chop them up, but we love homemade applesauce, so it's worth it! (It's much easier with regular size apples :) )

Applesauce is so easy, everyone should do it. Here's how I make it:

Rumplesauce
  • 2.5 quarts of chopped apples. I leave the skins on - that's where all the nutrients are, and I hate peeling. Bonus: if the skins are red, they will turn your applesauce a lovely pink colour!
  • 1/2 cup brown sugar (or to taste). Dark brown is yummiest, but you can use golden or regular granulated white, or honey, or agave... or none, if you don't like it sweet.
  • 1 tsp cinnamon
  • 1 tsp vanilla. Use real vanilla, not simulated flavour. I love Mexican vanilla and am dreading the day when the big bottle we got last time we were down there runs out. I guess that'll mean we're due for another Mexican holiday :)
  • 1 Tablespoon rum (optional. But it's just "applesauce" without it). Use the good stuff. We like Appleton Estates.
Chop the apples finely - about 1/2", especially if you're leaving the skins on. I suppose you could do this in a food processor, or with a grater. I did it the old-fashioned way with a knife.

Add the apples to a 5qt (medium size) pot and add water to about halfway up the apples. Stir in the cinnamon. Pop that on the stove, cover, bring to a boil, then reduce the heat and simmer for a while until the apples get mushy. Check every 10 minutes or so, give it a stir, and add a little more water if you feel like it. These ones took about 30 minutes.

Smash them with a potato masher, if you like lumpy applesauce. I usually do, but these apples were a little grainy - in that case, use a stick hand blender to puree. Add water if the consistency is too thick.

Add in the vanilla, brown sugar and rum, stir.

**If you want to make Rumple Butter, leave the pot on low, uncovered, until the mixture reduces to a spreadable consistency.

Ladle into jars. Freeze what won't be eaten in the next week (leave about 1/2" head space for freezing).
Makes about 8 cups of Rumplesauce. This recipe is easily adjusted for different amounts of apples. Add or use other fruit, if you like! Pears make great sauce or butter (reduce the water as needed, or add berries or even sweet potato (add more water as needed) for a different flavour, whatevs! If you're adding sweet potato, try using orange juice for a bit of the liquid! So yummy.

Monday, September 17, 2012

My go-to easy dinner: Quiche

If you've been reading for a while, you may recall that for 2010 I went eggless. (Why stop eating eggs? click to find out my reasons).

Well, that was an interesting year in the kitchen. I discovered that baking without eggs is really not that hard (check out some of my favourite recipes: Eggless Lemon Loaf, Eggless Chocolate Bundt Cake (so, so good), The World's Best Cookies, Eggless Orange Muffins, and Eggless Cheesecake.) - and the only thing I really, really missed was quiche.

I am back to eating eggs now - I'm still not comfortable with the whole egg production situation, but for now I am guiltily eating free-range eggs. They cost at least twice as much (and still are not kind - read more information about free-run, free-range etc eggs). I would love to find a local farmer who will sell me eggs by the dozen or flat from truly free-range chickens - the picturesque, ideal farmyard with chickens on the loose. Have you seen one lately? I haven't.

Anyway, the point is, I'm back to making one of my favourite dinners: quiche. It's on regular rotation at our house, and I love that it's so versatile. It's the kind of thing you can make for dinner when you're due for a grocery shop and there's not much in the fridge.

Here's my quick and easy recipe, if you feel like giving it a go. Does it look long and complicated? It's not. I just talk a lot.

Yummy Go-To Super Simple Quiche 

Crust:

  • 1 Tenderflake All Vegetable Shortening Deep Dish Pie Shell. 
Maybe some of you have the time to make your own pie crust (it's not that hard), but I'm lazy and want to spend the rare minutes that Mia is sleeping NOT making pie crust. They come in boxes of two, so if you're feeling virtuous, you could make two quiches at once and freeze one (they freeze well). Don't get the regular kind in the yellow box, unless you are okay with lard in your diet (ick). Look for the all-vegetable one in a blue box.

Filling:

  • 1/2 - 2/3 cup grated cheese. I like old cheddar, but any version of cheddar, mozzarella, mexican or italian blend (if you're into the pre-shredded bagged cheeses) will do. Or go funky and use chevre or feta (lovely with a spinach and sun-dried tomato version).
  • 3 eggs. You can't do quiche without these. 
  • 1 cup of milk.  Don't use less. The milk makes it nice and fluffy.
  • 1 cup chopped cooked vegetables. Here's where it gets interesting. I love any variation of mushrooms, onions, asparagus, broccoli, sun-dried tomatoes, spinach (yes, you can use frozen chopped, just thaw and drain it first), something leftover you have in the fridge (bruschetta topping? why not!). 
  • a handful of fresh vegetables or herbs (optional), for example: green onions, chives, parsley and so on.
  • dried herbs, if you like. I love using the Herbes de Provence that we got in (ahem) Nice. 1/2 tsp does nicely. But feel free to toss in some dried oregano (don't go crazy, that's strong stuff), basil, paprika, whatever floats your boat.
  • a couple pinches of salt. Not quite 1/8 tsp. 
  • Pepper if you like it.
Cook the crust according to package directions. That is, thaw it, poke it with a fork all over, stick it in the oven at 400F for 8 minutes. Near the end, take a look and if it's puffing up, poke it again.

Meanwhile, cook the vegetables if they're not already cooked. I don't care how you do it: steam, saute, microwave, whatever. And, grate the cheese, and chop your herbs if using.

Beat the eggs, and mix in your milk, herbs (dried or fresh) and salt and pepper if using. 

Take out the crust and decrease the oven temperature to 375F, put half the cheese in the bottom, then your veg, then the rest of the cheese, then pour on the egg mixture. Here's an extra yummy tip: drape some of your grated cheese all along the rim of the pie crust. It makes the crust taste like cheese straws. Nobody leaves the crust behind when it tastes like cheese straws.

Pop that back in the oven for 35-40 minutes. Put an old cookie sheet underneath if you're worried about it leaking over the edges. I hate cleaning my oven, don't you?

Check for doneness by poking a sharp knife in the center. If you see milky fluid, it's not done. If you see clear, it's done!

Serve that puppy up warm or cold with some steamed vegetables or a nice salad. Yum!

(Like all my cooking, this is a vegetarian recipe - but if you're into it, you can always add some chopped cooked ham or chicken to replace part of the 1 cup of cooked veg). Another note: yes, I do know cheddar has rennet in it and so is not actually a vegetarian product. Use a soy cheese if you're not okay with rennet. 

Tuesday, April 17, 2012

A Supreme Green Mess #FinishRevolution

This week I have been trying out a few new recipes from my stash of cookbooks. One of the ones I tried was Supreme Green Spaghetti, from my Vegetarian Times Complete Cookbook. Usually I love the recipes from Vegetarian Times - they can generally be relied upon to transform simple ingredients into delicious dishes. I was eager to test out the Supreme Green Spaghetti, because it looked so healthy and simple.
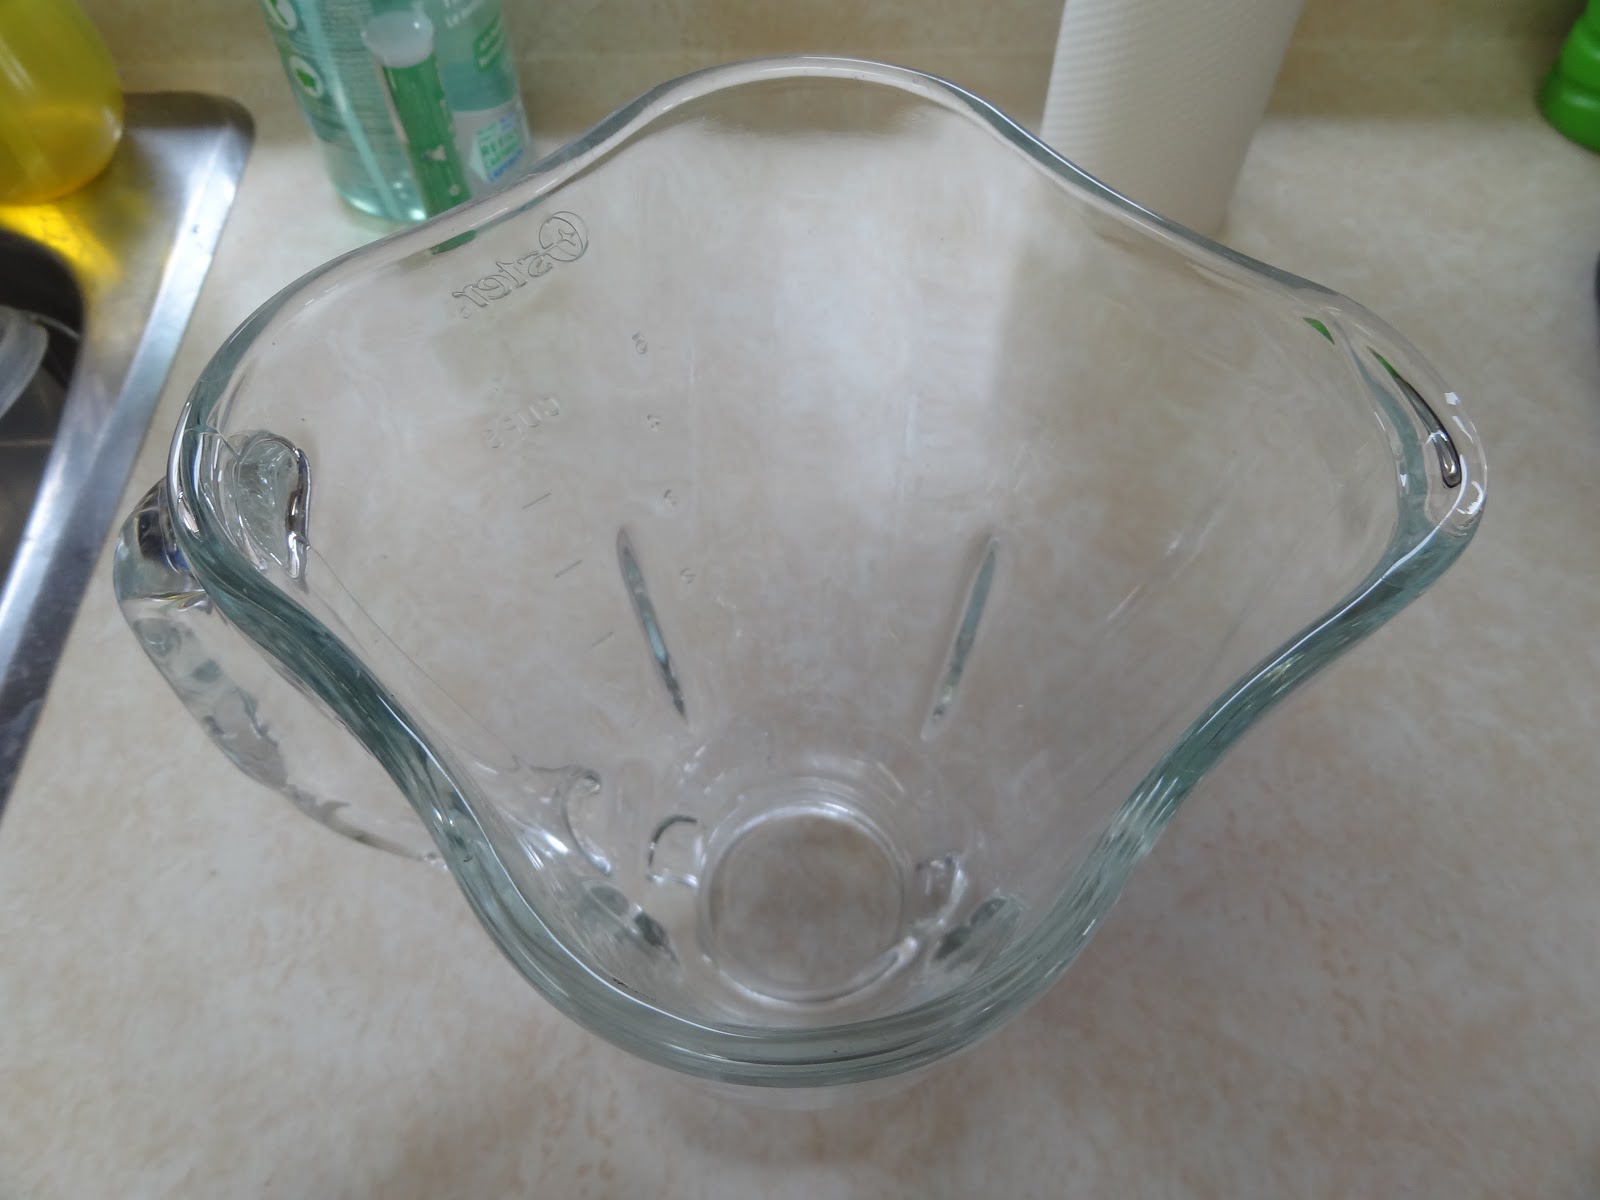
Well, it was simple and fairly healthy alright, but seriously devoid of flavour and had a disappointingly grainy texture! I usually happily modify recipes after the first by-the-book test - but this one is just not worth it. So I won't bother sharing it (it's not even on the VT site). Suffice to say, it involved blending cooked broccoli and spinach with milk, butter, salt and garlic to create a sauce for whole grain spaghetti. And even though I love all those ingredients, it was a mess. Not particularly tasty, the raw garlic had too much bite (although I'm a garlic lover), the texture was icky.

The only one of us who enjoyed it was my 14 month old. Bland pureed vegetables are okay with her.  My husband barely ate five bites - he said he wasn't that hungry, but I know he was sparing my feelings. And I managed half a bowl before giving up. The next day I added some organic tomato sauce to the dish and tried again, it was still not worth eating.

It's not too often that I create an absolute unsalvageable failure in the kitchen, but it does happen!

At any rate, the mess of a dinner came with a mess of a blender as well.  The blended bits of broccoli and spinach are exactly the kind of thing that tend to dry on and stick like glue to dishes. The dishwasher in our grotty rental house (we're moving by the end of the month to the new house, hooray!) is an old beast and does not do a great job by any means. So this was a big test for the Finish Quantum dishwasher tabs that I've been trying out. Here's the blender as it went in to the dishwasher:


 ...and that is how it sat in the dishwasher for four days. We're a small family of three and weekdays, as my husband only eats one meal a day at home, we take a while to fill up the dishwasher. So there it sat until we finally had a full load.

Oh, the suspense. Would I be washing that blender by hand afterwards? I HATE hand washing dishes, so I really was hoping for the best.

Well, you can stop biting your nails with anticipation - here's the result, fresh out of the dishwasher. Sparkling clean!


I am positive the tabs I was using before (store brand green tabs) would have left not only dried-on bits of green goo but also detergent residue on the glass. So I am quite happy with this result. If only we'd gotten a tasty dinner out of it!

Disclosure: I am part of the Finish Blogger Program by Mom Central. I received compensation as part of my affiliation with this group.  The opinions on this blog are my own.

Saturday, December 24, 2011

Holiday Appetizers

I haven't done a food post in a long time - mainly because I find cooking with a baby in the house is a quick and dirty affair. With my husband home for the holidays, we're getting a little time in the kitchen as we spell each other off on daughter care!

My husband made these rockin' Vegetarian Chick Pea Pot Pies (a lot of work, but they are so worth it... delicious!), and we were left with about a quarter package of extra puff pastry. Hmm!

I made some Stuffed Mushrooms -
  • 2 dozen large button mushrooms, of uniform size, cleaned
  • 1/2 cup cream cheese, softened
  • 2 Tbsp grated Romano or Parmesan cheese
  • 1/4 cup roasted red peppers, finely chopped
  • 2 Tbsp sun-dried tomatoes, finely chopped
  • 1 Tbsp chopped parsley
  • 1 tsp dried roasted garlic, if you have it handy (or the real thing, or none)
  • salt and pepper to taste
Pop the stems out of the mushrooms (and reserve for another use!). Lay the mushrooms bottom up in an ungreased baking dish with a rim - or, better, on a cooling rack placed over a rimmed baking sheet. These lose a lot of liquid while baking.
Drain the chopped peppers and tomatoes in a sieve to help keep the moisture down, as you don't want your mixture to be too wet. In a small bowl, mix the cream cheese with the grated cheese, and stir in the rest of the ingredients. Spoon cheese mixture into mushroom caps. Bake at 350F for 15-20 minutes and then broil until browned. Try not to forget about them under the broiler like I did (oopsie!) - unless you want dibs on the burnt ones! - give them about 4-5 minutes tops for broiling.
With the red, white and green filling, these are pretty at Christmas (or any time)!

Now, what to do with those mushroom stems and leftover puff pastry?? How about another appetizer?

Chipotle Mushroom Puffs

1 cup of finely chopped mushrooms (stems work just fine!)
1 small onion, finely chopped
1/4 cup grated cheddar
1-2 tsp of chipotle sauce OR 1/2 chipotle pepper, finely chopped
salt and pepper to taste
1/2 package of puff pastry (225 grams)
1 egg


Saute the mushrooms and onions in a bit of oil (I used oil from the sun-dried tomatoes - why not!) until soft. Allow to cool. Mix in the remaining ingredients. On a floured surface, roll the puff pastry out into a rectangle and cut it into 2" squares. Drop a dollop of mushroom mixture onto each square. Brush the edges with water and bring up corners to make a pouch. Pinch the edges together to seal. Transfer to a parchment paper lined baking sheet and refrigerate for 30 minutes.
In a small bowl, beat the egg with 2 tsp water and brush over the pouches. Bake at 425F until golden brown and puffed, about 15 minutes.

Yum, yum!

I will not tell on you if you sip Baileys and chocolate milk while cooking. I may have had to do a little of that myself.  :)

Thursday, September 22, 2011

Food, glorious food!

Today I want to direct your attention to The Muffin Myth, because I just came across it (thanks to Everything Mom) and once there spent a blissful half hour reading old posts. Beautiful, friendly writing and inspired recipes.

I made the Chickpea Salad from Katie's blog last night and we devoured it on bread with soup for dinner; now I'm gobbling it on crackers for lunch. So. Good.

ps try it on homemade crackers - I promise, they're so easy to make - and so yummy you'll want to make them often!

Friday, January 21, 2011

Filled Rolls recipe, more freezer meals

Yesterday was baking day - I put away:
  • Orange Carrot Oatmeal muffins (from Muffin Mania),
  • Bran Muffins (from Muffins and More),
  • Oatmeal Energy Bars (the same ones I made for Christmas tins here; the recipe, from Canadian Living, is here)
  • Filled Rolls (recipe follows)
And then made pizza for dinner. Lots of cooking, it's very satisfying to see that freezer filling up with meals for after baby's arrival! If there's a theme to the day's meals, aside from 'baking', it's fiber... I hear that's pretty important for post-natal mamas! ;)

Filled Rolls
(Vegetarian - but they don't have to be. Read the options!)

  • Your favourite bread or roll dough. You could use frozen (thawed) pre-made here. I used the whole-wheat mix-and-match dough recipe (from Canadian Bread Machine Baking) and added 1/4 tsp thyme. This was a small recipe, using only 1 cup of flour (a dough ball about 6" in diameter).
  • cooking oil
  • 1 onion, finely chopped
  • 2 Tbsp finely chopped zucchini
  • 1/2 cup finely chopped button mushrooms
  • vegetarian "ground round" - I used about 1/3 cup of "plain" because that's all I had on hand. You could substitute the spiced versions, or cooked meat if you prefer). I think 3/4 cup would be a good amount.
  • 2 Tbsp ketchup
  • 1 Tbsp chipotle sauce (or Worcestershire sauce, to taste, if you eat fish - it contains anchovies)
  • 1 Tbsp brown sugar
  • 2 Tbsp chopped fresh parsley
  • salt and pepper to taste
  • milk
Saute the onions, mushrooms and zucchini in a little cooking oil for about 5 minutes or until soft. Add in the remaining ingredients and stir to combine. Let cool. Taste it - you may wish to add more seasoning.

Divide the dough into dough balls about 3" (my dough made eight, your dough recipe may make more) and roll them out to about 1 cm. Fill with 2-3 Tbsp of the filling, gather and pinch the edges together firmly to seal. Place the rolls, seam down, on a cookie sheet lined with parchment paper (or greased). Brush the tops with milk (to help them brown).

Bake in a 375* oven for 25-30 minutes or until rolls are golden brown.

Makes about 8 buns that are a decent size for lunch, but the amount does depend on how much dough you start with, and how much filling you allocate per roll. Freeze them baked, and pop in the microwave when you want a hot, filling lunch.

Options (you know I love options!):
You could really fill rolls with anything. Here are some ideas:
  • Peanut butter and jam. Seriously... this would be so yummy.
  • Pizza fillings (1 Tbsp of sauce, cheese, and your favourite toppings)
  • Spinach and ricotta (use your favourite recipe for manicotti or shell filling (leave out egg); or simply mix frozen, thawed & drained spinach, a tub of ricotta, a pinch each of nutmeg and salt, maybe some sun-dried tomatoes). Serve buns with tomato or marinara sauce for dipping.
  • Taco filling (bean-based or meat-based), serve with salsa.
  • Chili (vegetarian or meat)
  • Cinnamon bun filling (use a plain white or sweet dough): butter, brown sugar, cinnamon, raisins, walnuts.
for the carnivores:
  • Swiss cheese and ham with a bechamel sauce
  • Saucy barbequed chicken or pork
  • Sloppy Joe meat (here's a good looking recipe - vegetarians can, of course, sub in veggie ground round for the beef!)
You could put tons of tasty things in there, all starting with just a batch of dough and some imagination.

BTW, for you foodies, there's a Vitamix giveaway going down at Chocolate Covered Katie...

Wednesday, January 19, 2011

Stocking the freezer - your ideas?

I'm trying to build up meals in the freezer so that after this baby is born, we won't have to think about cooking so much and can spend our time thinking about her!

So I've been searching for meal recipes that I can prepare ahead and freeze. Some are fully cooked and just need defrosting; others are prepared up to the point of baking and can just be popped in the oven.


So far I've made:
  • Chili (3 meals for 2) (my own recipe) + 1 meal's worth of biscuits (recipe from Muffins and More)
  • Bean burritos (1 meal for 2) (my own recipe)
  • Spaghetti Pie (4 meals for 2)
  • Four Cheese Stuffed Shell Casserole (3-4 meals for 2)
  • Breakfast burritos (15 burritos) - I doubt these will last long enough, but I want to see if we like them before making a whole whack. Frozen eggs sounds weird to me, not sure if they'll make the transition well. (To those of you who have been following a while - yes, I'm eating eggs again after a year's abstinence, and not too thrilled about it. I'm buying the 3x more expensive "free-run, organic" ones at the store as I haven't been able to find a local farmer from whom I can buy more ethically farmed eggs. It is a source of major frustration for me. For the newbies, here's why I am anti-eggs.)
  • Cheesy Spinach and Rice Casserole (4 half-meals - to serve with a salad, probably)
(the spaghetti pie and shells casserole are quite similar, actually... I hope we don't get tired of baked pasta dishes)
We also have a LOT of soups that we made over the summer in there already.

Still to do:
*We're vegetarian, so that limits the options a little.*

I'm considering making runzas (a.k.a. bierocks), but have never done them before and am not sure what to fill them with as we don't eat meat, and my husband hates cabbage (the traditional filling has both). While I sometimes use those vegetarian versions of ground round, I'm not too keen on them (soy's a phytoestrogen, not something I want to play a huge role in my diet). Maybe some kind of vegetarian sloppy joe type filling? Pizza toppings? They seem like they'd be a pain to make, but yummy and tidy to eat - great for one-handed lunches.

I'd like to get a dry-erase magnetic board to put on the freezer so that we have a menu of meals & an up-to-date list of freezer contents. It would be nice to be so organized!

Here's where I need your help: I need some more ideas - and recipes! Do you have any favourite meals that are happy to spend some time in the freezer? Though I haven't made much in this line yet, we love ethnic foods (Indian, Mexican, whatever), so bring it on.

Wednesday, December 22, 2010

Tropical Traditions Coconut Flakes - Review & Giveaway!

***This giveaway is closed.***
Winner: Jennifer

I hope you like coconut! Tropical Traditions was kind enough to send me a GIANT bucket of their Organic Coconut Flakes to try out. I'm talking about 2 lbs of fluffy flaked coconut here!The coconut is dessicated, so 2 lbs is a lot! I can't wait to use it in lots of things from curries to cookies and bars. It comes in a 1 gallon pail that I admit I had a little trouble opening. It has a break-off tab, and you peel off a strip, and then bend back the tabs to open. But the tab that you pull the strip with broke off completely... Thanks to sharp scissors and determination, I did get it open. To close it I had to kneel on it! That tells you just how strong the seal is! I am sure that with more openings and closings it will become easier to do. Sometimes you just have to put your back into baking!

This arrived with perfect timing for that last minute holiday baking. But I've done a lot of that - I decided to make Oatmeal Energy Bars. I got the recipe from my Canadian Living Baking Book(which I recommend - lots of great recipes), but you can also find it here, at the Canadian Living website. (Of course, there are loads of recipes on the Tropical Traditions blog too - just search for "coconut flakes"!) And although I was planning for these to be lunch treats for my husband to take to work, they are so pretty and tasty that they're going in the holiday tins, too, cut small into bite-size pieces.Check out that big bucket of gorgeous coconut! I also used Tropical Traditions Organic Thick Rolled Oats in this recipe (you can read my previous review of those here). The coconut smelled wonderful as soon as I got that lid off. It's crispy and fresh-smelling. I like flakes better than shredded, because to me shredded coconut has a sawdusty texture. I'm weird, I know.I didn't have apricots for the recipe, so I substituted raisins. I would have used dates, only someone (okay, it's my husband) doesn't like them. Bah. And slivered almonds? I only had whole. So I whizzed them in my mini food processor to chop them up. You could really substitute anything for the dried fruits and nuts in this bar. I love dried cranberries, so those go in for sure! But you could go for variety by adding anything from desserty options like chocolate chips and mini marshmallows to pepitas and goji berries.

And here's what you do when the recipe calls for a 9x13" pan, but your 9x13" pan is in the fridge, full of a cashew and eggplant casserole - line a bigger pan with parchment paper, fold up an edge to approximate a 9x13"-ish size, and fill the rest of the pan with your pie weights (we use beans). Looks funny, works great.
Look how they turned out! Yum! If you wanted to get fancy, you could drizzle them with melted white chocolate or that "yogurt" coating stuff (aka partially hydrogenated palm kernel oil, whey powder, yogurt powder and sugar... not healthy at all).

Tropical Traditions has generously offered one of my readers the chance to try the Organic Coconut Flakes for free!

The giveaway:
A 2 lb pail of Tropical Traditions Organic Coconut Flakes!


How to enter: Head over to Tropical Traditions and let me know one other thing you'd like to try, OR one thing that you learned there. Make sure I've got a way to contact you if you're the winner!

Extra entries (please leave an extra comment for each):
  • Subscribe via email to the Tropical Traditions newsletter
  • Follow @troptraditions on Twitter (leave your Twitter name!)
  • Follow me on Twitter (leave your Twitter name!)
  • Tweet about this giveaway for ONE entry, this is not a daily! You can use this if you like:
    Win ~Organic Coconut Flakes~ from @TropTraditions at Emily's Latest @emilyisland US/CAN http://bit.ly/fCuvqU (Ends 1/6)
  • Follow my blog (publicly) – 2 entries, leave 2 comments
  • Add my blog button to your blog– 2 entries, leave 2 comments (please leave a link to your blog)
  • Blog about this giveaway, linking back to this post and to Tropical Traditions – 2 entries, leave 2 comments and please include a link to your post
  • Let me know what you'll be making first with these if you win!
I will be verifying comments so please actually do the things you say you do ☺ If you already do any of these things, it still counts for entries!

Please be sure to include your email address if it’s not public in your blogger profile! Anonymous comments without a way to contact you will be rejected. Canadian or US mailing addresses only, please. Giveaway ends January 6th at 11:59 EST. A winner will be drawn the next day, announced here, in a separate post and emailed!

Prize will be shipped by sponsor. Note for Canadian entrants: Tropical Traditions is not responsible for customs or duties that Canada may charge if you decide to participate in this Tropical Traditions sponsored blog giveaway. (FYI - it's unlikely to have a charge, being well under the $60 that incurs duty charges. There was no extra charge on my shipment, which came to Canada quickly and packaged well.)

I received the product to review, but was not otherwise compensated for this review.

Tuesday, December 21, 2010

The Easiest Fudge Ever, and No-Sew Tutu tips

Want an impressive, crowd-pleasing treat for the holidays in under 10 minutes? This is it... Great for holiday baking tins, after dinner with coffee, to take to or serve at parties, and so many variations!

Super Easy Microwave Fudge
  • 3 cups chocolate chips (any variety - dark or milk chocolate, peanut butter, mint chocolate, white chocolate, go crazy!)
  • 1 14oz can sweetened condensed milk
  • 1/4 cup butter
  • 1 cup of add-ins (mini marshmallows, chopped nuts, candied cherries, dried cranberries, white chocolate chips if using dark or vice versa, crushed candy cane, chopped candy bar, Skor bits, coconut flakes, anything goes!)
  • 1 tsp vanilla
Combine chips, milk and butter in a microwaveable bowl. Heat 3-5 minutes on 50% power, stirring every minute until chips are melted. Stir in vanilla and add-in ingredient (save some for sprinkling on top if you like!).
Line an 8x8" pan with foil and grease foil (if you forget, don't panic - it's just a little harder to peel off the foil later).
Pour the chocolate mix into the pan and refrigerate until set.
I used chocolate chips and chopped pecans - yum!
Makes 64 1" squares of deliciousness. They look great on a tray with cookies, or in a tin in those little paper candy cups. Some of the options that sound yummy to me:
  • white chocolate macadamia nut
  • white chocolate cranberry
  • milk chocolate Skor
  • milk chocolate with peanuts and raisins
  • dark chocolate cherry
  • peanut butter with white chocolate chips
  • any chocolate with rice krispies
  • mint chocolate chip with marshmallows
  • adding a little cinnamon or even hot pepper flakes would make an interesting change
You can divide it into smaller pans and make different batches, too (half chocolate-nut, half chocolate-cherry). So versatile! I love it.

In other news, I did end up making tutus for my nieces, and bought my tricky-to-buy-for eight year old nephew a children's cook book, which he actually seemed pretty excited about (we had the big family Christmas on the weekend).

Here is one of the no-sew tutus I made, generally following instructions I found online. It took about 6 yards of tulle, cut along the bolt fold and cut into 6" strips, per tutu. I used pink elastic at the waist, about 20" long with an inch overlap, sewn (the girls are 3 and 4 years old), and added a ribbon at the waist as well, so that they can tighten it for now and it still has room to flex later. The trick I discovered for tying the tulle is to lay the closed blades of a pair of scissors along the elastic & ribbon combo and tie the tulle around the whole thing. The blades of the scissors easily slide over to the next spot to tie, and it prevents the knot from being too tight around the elastic (if it's too tight, it won't stretch or will stay stretched out).

I will say that this took a lot longer than I had expected - it was not a quick project. I think it would be faster to make a sewn tutu! A little basting and elastic, voila. I guess I will know for next time, if I ever tackle a tutu again. For now, I am so over tulle!

Sunday, December 12, 2010

A start on holiday baking

I've started making the treats for my holiday tins -
kind of a lousy photo, sorry!

Chocolate dipped pretzels - two kinds. These are super easy to do, and fun. I think next time I would use pretzel twists, I was thinking rods would be easier (and they probably were) but they are not quite as pretty.

Just melt 1/2 cup of chocolate in the microwave at 50% power for 3-5 minutes, stirring every minute, dip the pretzels, lay on waxed paper, and sprinkle. I used Belgian milk chocolate sprinkled with Skor bits for half, and dark chocolate-mint (mint-flavoured chocolate chips make that super easy) with sprinkles for the other half. If I were really fancy I would have drizzled with white chocolate - but I'm not.

Thumbprint cookies from the Canadian Living Baking book - made with brown sugar instead of white, and rolled in chopped pecans. For the filling, I did half the batch with Crofter's Europe Superfruit (pomegranates and black currants blended with red grapes and morello cherries), which wasn't as pretty as I'd hoped - the filling went really dark after baking, and the jam is so thick that it didn't spread out at all (they do taste great, though!). The ones that you can see in the picture are the other half batch, for which I used homemade strawberry-mango jam, and I think they were more successful. These were a bit of work for only three dozen cookies, but they are so pretty and delicious. You can also top them with chocolate chunks or Hershey's kisses - I was thinking how pretty and festive white chocolate or yogourt with a dried cranberry in the center would be, too. Lots of options!

The cookies go in the freezer for a few days until I am ready to make up the tins, to keep their freshness. The chocolate dipped pretzels can hang out at room temperature (freezing or refrigerating would make the chocolate "bloom").

Still to come - shortbread, ginger cookies, and super easy microwave fudge. I'll share that fudge recipe with you, too - it's so simple with great results.

Monday, November 22, 2010

Weekend deliciousness

This weekend we had a dinner date - the kind where we spend time in the kitchen together, cooking something neither of us has ever made before. My husband chose the recipe:

Schwammerlgulash mit Semmelknoedeln

Yes, it's a mouthful!

When we were out in Kimberley, B.C. in September, we had the pleasure of dining at the Old Bauernhaus Restaurant. This is a traditional Bavarian restaurant in a remarkable setting - a 370 year old building that was transported piece by piece from Bavaria! My husband (the sometimes carnivore) had the schnitzel, and I had the Knödel (bread dumplings) in a wild mushroom sauce. The food was delicious (and, like most German food, SO filling!). So, his inspiration for making this dish was our fabulous meal at the Old Bauernhaus.

The recipe makes 8 dumplings and plenty of mushroom goulash to top them. This is easily enough for four hungry people to eat for dinner (I managed one and a half dumplings before I was full to the brim!). It also came together faster than I'd expected. We used about 500g of mixed mushrooms (the recipe calls for 800g) and that was plenty. I think next time we would use the food processor to chop the mushrooms. We also substituted sherry for the white wine, just because we had it handy. (We also decided we'd stir in a bit of sour cream to the sauce next time, to give it a richer texture and a bit of a bite.) It was so yummy. Definitely recommended for a very rich, filling and impressive meal that isn't too time consuming to make. You could easily prepare the uncooked dumplings ahead of time and refrigerate until you're ready to cook them.

Today was a rainy and house-bound kind of day, and I decided to make Pumpkin Cinnamon Rolls with Cream Cheese Frosting. We had some cooked pumpkin in the freezer, perfect to puree and use in these (though of course, you can use canned)!

I found the recipe at Good Life Eats, though I just tried to take another peek at it and the site is down. Hopefully it comes back up soon (and thank goodness I copied down the recipe!). As with most yeast breads, this was a fairly time-consuming recipe - mix, rise, roll, fill and cut, rise, bake... but definitely worth the effort. The pumpkin flavour is subtle, the cream cheese frosting is delicious, and the rolls are moist and soft. You even get to say you're eating your vegetables and healthy whole wheat :) If their site doesn't return and you really want the recipe, leave me a comment and I'll try to post it.

I did find I needed to add more flour than the recipe called for, and I also added about 1/2 cup of walnuts sprinkled over the sugar filling (I mix the butter and sugars for the filling before spreading, too, which I think is easier). And... don't tell my hubby, but I didn't defrost quite enough pumpkin and had to add a little pureed sweet potato (possibly his least favourite vegetable). He didn't notice, phew! So, yes, you can substitute! :)

Okay, honestly, they are not healthy at all... but they sure are delicious.

One more thing... we had initially considered eating the Knödel with a side of meatless "chicken nuggets" - while the flavour would have worked with the mushroomy Knödel, thank goodness we didn't as we were already so stuffed. Anyway, my husband came up with the most hilarious term for chicken nuggets that nearly made me narf my dinner. Seriously, I laughed until I cried. Never mind that the pregnancy hormones make me do that often, this was really funny. Ready for it?

...

"ghetto schnitzel"

!

Ha! I was picturing people ordering a 6-pack of ghetto schnitzel at McDonalds.... :D Feel free to use and abuse at will. It would make me very happy.

Friday, September 10, 2010

The big reveal! And, easy pickles (recipe).

(because these things go together! Pregnancy & Pickles!)

So, it's finally time for the Big Reveal! Exciting, right?! Actually, I let it slip last night on Twitter (oops!), although I think only one astute person (hi, Maya!) caught on!

Today I went for the anatomy ultrasound and the gender was confirmed - well, as much as they will confirm it - she said she 'strongly believes' it's a....

...

...

...

Ha! Betcha thought I was telling there.

Really, I needed to hear and see it again. After all the input I've gotten from different sources, including you guys on my little poll up there - I had myself convinced it was a boy. Well, guess what?

Baby's a GIRL!!! Here she is - It's all looking good, only I have a 'low anterior placenta', which hopefully will resolve itself in the next couple months and not result in a C-section (eeks). All the development is right on schedule and there are no soft markers for any problems like Down's or neural tube problems. Hooray!

I am finally feeling more confident that things will be okay. Did I tell you I bought a crib off Kijiji? I got a white sleigh crib. It's still disassembled for now - I can't wait to start playing nursery. It's hard with my husband gone, as we like to make most decisions together. And in general, we like the exact opposite things (doesn't that figure?), so purchases for the nursery will have to be very well considered and approved by both of us!

I also am making the switch from OB to midwife. I'm going back to the midwife I had for my first pregnancy. I can't tell you the relief I feel about this. The OB I was seeing was professional, respected, and competent, but I'd wait an hour after my appointment time to see him for 5 minutes. And sometimes I felt like I was being rushed out the door, or that my questions were 'silly'. When I told him today, he actually seemed annoyed with me - and said, "Well, why did you even start with me?". Whoa. My family doctor referred me to him when I had an ectopic pregnancy, that's why. And after that I figured he was my go-to guy for OB/gyn stuff.

Anyway. Closing the chapter.

I found the midwife to be profoundly empathetic, calm, patient, and kind. She never acted like my questions were silly or condescended to me. She always treated me like a person, not a name on a list. She was incredibly giving of her time and so, so kind when I went through the first miscarriage. I am looking forward to being in her care. Plus, I trust her to avoid interventions as much as possible and aim for a more natural birth. The OB was already talking about C-sections, for goodness' sake. I'm 'only' 19 weeks along!

On to pickles - With an abundance of cucumbers in the garden and only me around to eat them, I decided to whip up some refrigerator pickles. This is super easy to do, doesn't require any canning experience, equipment or know-how, and I think you should do it too.

Refrigerator Pickles

you will need:
  • 2 cups of cucumbers (or zucchini, green/yellow beans, green tomatoes, bell peppers, whatevs), peeled (unless they're the skinny English kind) and cut into spears or slices at your discretion
  • 2/3 cup sliced onion (sweet, white, or red - or pearl onions, or quartered small onions, or a lesser amount of quartered shallots)
optional jar add-ins, as you like it:
  • 2 cloves garlic
  • 1 hot pepper (jalapeno, little red chilis, or 1 tsp of red pepper flakes)
  • 1 Tbsp chopped fresh dill (or 2 tsp dried, or a sprig of fresh per jar)
for the brine:
  • 2 cups white vinegar (or apple cider, if you like)
  • 1 to 1 1/2 cups sugar, depending on how sweet you like your pickles
  • 1 Tbsp salt (regular granulated will dissolve better, but you can use coarse pickling if you like)
optional brine add-ins:
  • 2 tsp mustard seeds
  • 2 tsp celery seeds
  • 1 tsp pickling spice mix
  • 1 Tbsp of dried roasted garlic (I used PC's Blue Menu)
  • any spice you like (try turmeric + curry powder for an Indian flavour, or caraway, or groud mustard)
Take all your cut up vegetables and optional jar add-ins, and fill up your jars. I used two 2-cup jars. (Actually, I doubled the recipe and made four!) You don't even have to use canning jars - any old waterproof container with a lid will work (although the hot brine could cause icky chemical seepage in plastic containers - if you want to use those, prepare the whole mess in a big glass bowl and ladle it into containers after it's cooled). Don't pack too tight, you need some room for the brine. I probably could have packed a little tighter. As you can see, cucumbers and onions float!

Combine the vinegar, sugar, salt and your optional brine add-ins in a pot on the stove and bring it to a simmer, stirring to dissolve the sugar and salt. Once it's all dissolved, ladle it over the vegetables, cover, and put in the refrigerator.

Now, the hard part. DON'T EAT THE PICKLES for at least a couple days, if you can stand the wait. They will keep for months in the fridge, but I guarantee they won't last that long because they are super yummy! And easy enough to make any old time.

I'd love to hear if you make these! It takes hardly any time at all and is so worth it. Ready? Go!